I haven't done a math lesson post in awhile and here is a fun one! It goes along with the Geometric Origami Mini Kit by Richard L. Alexander and Michael G. LaFosse.
This kit includes a booklet, a DVD and some mini origami paper. The booklet has instructions for six different origami items and the DVD demonstrates how to make all six. The nice part of having the DVD is sometimes origami instructions can be a bit confusing, so being able to actually see them is great. This is a fun kit that is very reasonable and each project lends itself to a math lesson. I made up a lesson for the first project for various ages and will give suggestions for the second one.
Using origami in a geometry class can help to make a lesson fun and also can force the students to think outside the box. If doing it in a classroom you can show the DVD and/or you can demonstrate with an overhead projector. Just cut squares of wax paper for your demonstrations. The folds will show on the projector. Also if you are using with a classroom you do not need special origami paper. You can buy those small rainbow memo pads. I found one recently for around a dollar and it has over 100 sheets in various colors. They work fine and I actually used them for some of the cubes I made for this post.
 |
| My Harlequin Cubes |
The first project is called a Harlequin Cube in the kit. The following are similar instructions that I found on YouTube. However in the kit two colors of paper are used.
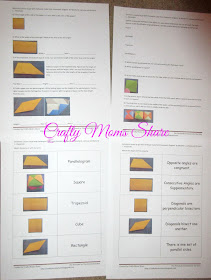
Making this cube many of the special quadrilaterals: square (the paper itself), rectangle, parallelogram, and trapezoid. With the folds you can expand on the shapes and discuss the various special properties and even demonstrate a diagonal.
 |
| Quadrilaterals from Project 1 |
Then there is the entire part of three dimensions. Depending on how you fold the paper creates different types of symmetry as well. If you compare the three cubes you will notice that some of the triangles are not meeting in the center of the square on a couple of them. Ask how this affects the symmetry.
 |
| Cube made with symmetrical (center) folds |
The second project makes a beautiful star. It is fun and the kids will love it. It also has many triangles and kites in it. Kites will help to complete the quadrilateral family with just a non-square rhombus missing.
While making the star the pieces form kites in different points. Discuss the properties of a kite (two pairs of consecutive congruent sides, one pair of opposite congruent angles, etc.). Fold the kite to show the congruent sides and angles. Let them figure out the property of the diagonals being perpendicular. See if they can figure out the lengths of the diagonals or calculate the area if the length of the paper sides is 1 unit? Have extra paper for them to play with to figure it out. (The lengths of the diagonals are the square root of 2 and 2/3.)
While making the kite shape there are several triangles formed. Find the ratio of the areas of the triangles. For younger kids discuss the type of triangles. Are they right, acute or obtuse? Are they scalene, isosceles or equilateral? What else can they figure out. There are more triangles formed later in the pieces. Classify them. Is there enough information to figure out the area of them?
Students will enjoy making the shapes and it gives them a hands-on way to play with measurements and explore. Origami has been used in many math classes and it adds so much more to the class. I hope you will try it and check out this great mini kit. With any origami project one can look at the shapes formed in each step. Some projects lend themselves to more lessons, but each origami has some lesson in it.
For more origami posts check out:


No comments:
Post a Comment
I love to hear your comments and ideas. Thank you for reading and contributing!