Disclosure: I was sent these books to review
free of charge from Barron's Educational Services.
All opinions in this post are my own. I did not receive
any other compensation for this review. I am including links to each
item for your convenience but do not receive anything if you purchase from
them.
I have to admit I have jumped on the adult coloring book bandwagon. i love them!! They are so relaxing and fun. Today I am going to share with you three adult coloring books from Barron's Publishing and a craft you can do with your finished pages or wrapping paper, scrapbook paper or other things. We will start with Christmas Magic illustrated by ArsEdition.
All three of the books have pages that have white or black backgrounds. This is no different. The pages in this book have a Christmas theme but also a winter theme. There are many pages with snowflake motifs and just designs. The colors will make it feel Christmasy or wintery. Here are some pages I colored or began to color. I found some of the small snowflakes a bit hard to color because the spaces were so small.
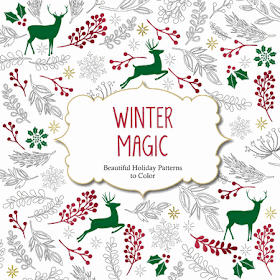
All three of the books have nice thick pages as well. The second book is Winter Magic also illustrated by ArsEdition. This one is very similar to Christmas Magic. Some of the pictures are winter themed and others are Christmas themed.
Then there are some pages of flowers and designs that are really neither.
I will use this flowered page in my craft that I will share in a bit. The page below shows a partially colored design. I decided to make it more Christmas themed with the colors.
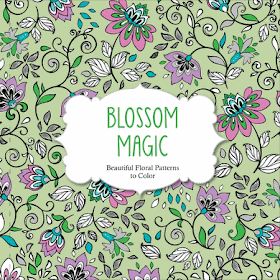
Our third book is Blossom Magic also illustrated by ArsEdition.
I wanted to check out one of their non-holiday books. This has beautiful flowers, insects and other animals from a garden.
I started my craft with the top page of multiple flowers, but made a mistake. You will see it in my tutorial though.
All three books are a wonderful quality and have beautiful pictures to color. I can recommend all of them highly!!
I decided I wanted to do something with my pages. I decided to line an envelope. I had seen this done where I work and I have the templates for envelope liners from Paper Source. Of course to use these templates you really need Paper Source envelopes. I had a birthday card for my sister that I thought I would line with some flowers that I colored. Since I got the card at Paper Source I tried their template first for an A2 envelope. However the card's envelope was not a Paper Source envelope and I did not like how it came out. I had to free hand cut the edge since the template had a long point.
I decided to make my own template. To do this I put the left edge and bottom edge off the paper edges by about half an inch or so.
Then I traced the envelope and cut out my template. I used a cardstock for my template but for just one envelope any paper will work. Then I lay my template on my picture paying attention to which part of the page would be on the liner. Then I traced it.
Then I cut out the lining and tried it in the envelope. Once I had one I liked I used a tape runner to secure it to the envelope.
Now when I send my card my sister will have a pleasant surprise. Here is how it looks with the card in it.
So this is very easy and would be easy to do with wrapping paper to match a gift as well. Plus it helps use some of the coloring pages instead of having them just sit in a book. Of course the ideal ones would not be double sided, but these pages were. I decided to sacrifice the back side for the liner though.
Crafty Weekends Link Party
I have to admit I have jumped on the adult coloring book bandwagon. i love them!! They are so relaxing and fun. Today I am going to share with you three adult coloring books from Barron's Publishing and a craft you can do with your finished pages or wrapping paper, scrapbook paper or other things. We will start with Christmas Magic illustrated by ArsEdition.
All three of the books have pages that have white or black backgrounds. This is no different. The pages in this book have a Christmas theme but also a winter theme. There are many pages with snowflake motifs and just designs. The colors will make it feel Christmasy or wintery. Here are some pages I colored or began to color. I found some of the small snowflakes a bit hard to color because the spaces were so small.
All three of the books have nice thick pages as well. The second book is Winter Magic also illustrated by ArsEdition. This one is very similar to Christmas Magic. Some of the pictures are winter themed and others are Christmas themed.
Then there are some pages of flowers and designs that are really neither.
I will use this flowered page in my craft that I will share in a bit. The page below shows a partially colored design. I decided to make it more Christmas themed with the colors.
Our third book is Blossom Magic also illustrated by ArsEdition.
I wanted to check out one of their non-holiday books. This has beautiful flowers, insects and other animals from a garden.
I started my craft with the top page of multiple flowers, but made a mistake. You will see it in my tutorial though.
All three books are a wonderful quality and have beautiful pictures to color. I can recommend all of them highly!!
I decided I wanted to do something with my pages. I decided to line an envelope. I had seen this done where I work and I have the templates for envelope liners from Paper Source. Of course to use these templates you really need Paper Source envelopes. I had a birthday card for my sister that I thought I would line with some flowers that I colored. Since I got the card at Paper Source I tried their template first for an A2 envelope. However the card's envelope was not a Paper Source envelope and I did not like how it came out. I had to free hand cut the edge since the template had a long point.
I decided to make my own template. To do this I put the left edge and bottom edge off the paper edges by about half an inch or so.
Then I traced the envelope and cut out my template. I used a cardstock for my template but for just one envelope any paper will work. Then I lay my template on my picture paying attention to which part of the page would be on the liner. Then I traced it.
 |
| Store Bought Template Outlined in Bright Pink |
Then I cut out the lining and tried it in the envelope. Once I had one I liked I used a tape runner to secure it to the envelope.
Now when I send my card my sister will have a pleasant surprise. Here is how it looks with the card in it.
So this is very easy and would be easy to do with wrapping paper to match a gift as well. Plus it helps use some of the coloring pages instead of having them just sit in a book. Of course the ideal ones would not be double sided, but these pages were. I decided to sacrifice the back side for the liner though.
Crafty Weekends Link Party
Thank you to everyone who shared with us at last week's party!! There were some amazing crafts shared and this is just a sampling. Be sure to check them all out!!
1) From Purple Hues and Me: Santa Bow Wreath/Wall Hanging DIY
2) From Crochet for You: Crochet Snowflake Using Punched Hole Free Pattern
3) From Crafty Journal: Rockin' Cardinal
4) From Rena Klingenberg Jewelry Making Journal: Mixed Metal Industrial Pendant Tutorial
5) From Ilkas Blog: Cupcake Liner Owls
6) From JoyJonne Hooks: Lalylala Deer (Note: She shared this on Sharing Saturday, but I thought it was a better feature for here!)
7) From Thistlewood Farms: DIY Giant Chalkboard Calendar
8) From Wesens-Art: Kids' Craft Kissing Bells
Thank you to everyone who shared the last week!! I hope you will share again!! If you are featured here, please feel free to grab a featured button to display proudly on your blog.
Please share family friendly crafts here. Just crafts and/or patterns--no recipes, lessons, etc. You can share craft product reviews as well. By linking up here you are giving me permission to share your links and to pin your links. Please follow my Crafty Weekends Feature Pinterest Board to see all the features from these fun link parties!


No comments:
Post a Comment
I love to hear your comments and ideas. Thank you for reading and contributing!