Disclosure: I was sent a box of this origami paper in exchange for an honest review. All opinions are my own.
I have shared I have been on an origami kick since I subbed at Hazel's school for the geometry teacher. I have had a piece of origami artwork I have been waiting to share. For some reason I thought the paper I used wasn't released yet, but it was, so I am finally getting to share it with you. I will also share the tutorial to make the butterflies on it.
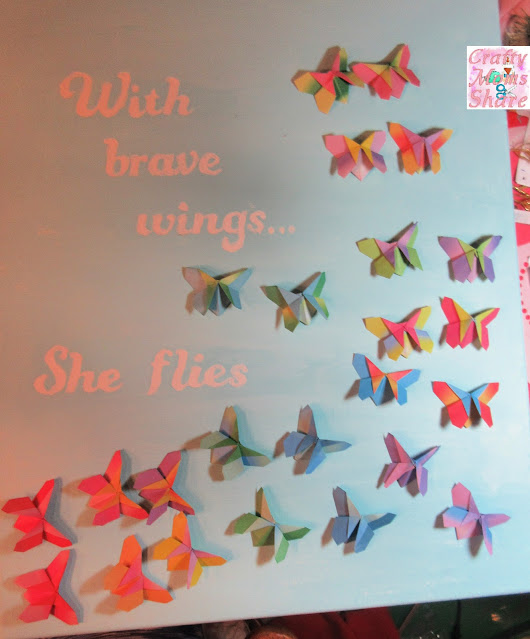
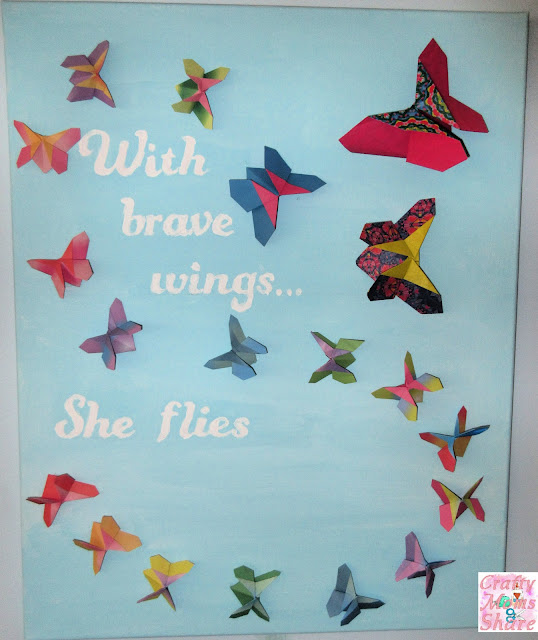
As I was searching for butterfly crafts and party supplies for Hazel's birthday, I saw adorable projects made with fabric origami butterflies like the ones at Quilting Digest and eSheep Designs. Both use the same tutorial for the Matthews Butterfly on Origami Instructions. I find their instructions a bit hard to follow because of the format of the page. You have to scroll down, and the instructions are in the right column which is very thin. I also have had times where the photos do not load correctly. So, I am going to share my own tutorial for it following theirs. Once I saw this, I wanted to try it. Before making any in fabric (which I still haven't) it was suggested to know the folds by practicing with paper. When I did this and saw how easy it is to make this style of butterfly, I knew I wanted to do something with it. I imagined a painting with the words "With brave wings she flies" and a rainbow of paper butterflies flying around the words and getting bigger. I made it!!
When I saw the Origami Paper 1,000 Sheets Color Bursts 2 3/4" x 2 3/4" paper I knew it was perfect for the small butterflies!!
The paper is among the smallest origami paper I have seen. It has 12 designs with either a bullseye design or a cross like design and solid backs. And it is in a rainbow of colors. The side of the box shows all the papers.
To make my vision into a reality I took a large canvas and drew lines on it. Then I used stickers for the words and placed them using the lines. (I now wish I had planned out my butterflies first because I wish the "she flies" was moved to the right more.)
Then I painted the entire canvas a blue to be the sky!
Once the paint was dry, I removed the stickers so the words would be in white like clouds.
Now it was time to make the butterflies. I made several of them out of the different papers in the box. I also made some bigger ones from other origami paper I reviewed previously. I cut some of the bigger pages down to have different sizes, so the butterflies grew.
I wasn't sure how I wanted to arrange them, so I made many of the small butterflies. Then I placed them how I wanted them and glued them onto the canvas with craft glue.
I was going to have Hazel hang it in her work room, but for now it is hanging in our family room. I am loving it!
Origami Butterfly Tutorial:
Now I was really excited to find an easy origami butterfly tutorial because I have found butterflies pretty hard to make well in origami. I found the Matthews Butterfly easy to make and continuously easy to do well. I am using a large piece of origami paper to demonstrate how to make it so it will be easier to see. I chose solid colors, so the print won't distract or hide steps.
To make it you need to start with a rectangle. So, fold the square paper in half and unfold. Fold the top edge to the center line and unfold.
Cut the top quarter of the sheet off and discard or use for another project. Note: This butterfly can be made with other types of rectangles. This is the one suggested in the original tutorial. I have used different proportions to make them.
Using the larger rectangle, fold the long side in half like it is a greeting card.
Fold this in half again (left to right sides together).
Now take one side of the fold and open up the non-folded edges to form a triangle.
It will look like this.
Flip your paper over and repeat opening the non-folded side and forming the triangle.
Fold the corners where the folds meet up to make right triangles.
Now we are going to reverse fold those triangles, so they are on the inside of the paper. It sounds harder than it is. You will open one of the flaps and fold the triangle on the inside.
Then do the same thing on the other side.
Now you will fold one layer of one of the flaps up towards the vertex of the triangle (the top point). This will create one side of your butterfly.
Repeat on the other flap.
I like to now crease the body again to give it the 3-D look a bit more.
I love that the butterfly is relatively easy and can be made by kids. It is also a perfect origami project to go with Encanto. The butterfly plays a key role in the movie.
I wanted to share a few other projects I have made with the small Color Bursts Origami Paper. I was trying to find projects that would show off their fun designs and colors. Since the papers are under 3-inches the projects are miniature!
An origami heart seemed perfect to show off the pink shades.
I also made a paper airplane, square balloon, and ninja star following tutorials in There's Math in My Origami. The airplane got a little messed up from Hazel and I flying it to each other and often hitting each other.
I also followed tutorials to make a love letter (which looks like the screaming note in Harry Potter) and a star. The star is made by making two triangles and gluing them together.
My final project is a flower ornament. You have to make six of the same flowers and glue them together. I made a large one for the geometry teacher and now I made a miniature one for myself. The gluing together is the hardest part. They do not stick well. I actually tried to tape them in the miniature form.
I love how the flowers came out. Now if I can get the ornament to stick together well enough, I'll add a string and hang it up. I love having the smaller sheets of origami paper and love their designs. There are a larger sheet of these designs coming out this spring! Happy folding!!


No comments:
Post a Comment
I love to hear your comments and ideas. Thank you for reading and contributing!