Google+
Showing posts sorted by relevance for query sew. Sort by date Show all posts

Sewn Together -- Crafty Weekends Review and Link Party

Disclosure: Lark Crafts sent me a copy of this book free of charge to review. All opinions in my review are my own and I did not receive any other compensation. As in all my reviews I am providing links for your ease, but receive no compensation.

Hazel loves doing crafts with me and especially likes to sew with me. Her sewing is not perfect and she definitely needs more practice, but she knows how to do it. Today's book is perfect for teaching a child to sew and for just having some sewing projects to do together. We are sharing Sewn Together by Jenny Doh.


http://www.barnesandnoble.com/w/sewn-together-jenny-doh/1119955942?ean=9781454708773


Sew Sweet Handmade Clothes for Girls Book Review

For Advent, I thought I would share each post where our Mouse and the Miracle Mouse (Holy) has been up to. (He now has an elf friend named Elfie who often is hidden with him.)

Watching the visitors come to see the Newborn King!

Disclosure: Tuttle Publishing gave me a copy of this book free of charge for this review. All opinions in my review are my own and I did not receive any other compensation. They also sent me a copy to giveaway! As in all my reviews I am providing links for your ease, but receive no compensation. 

Today I am going to share with you a wonderful sewing book which I have had for way too long and have not shared. My plan was to make one of the adorable dresses for Hazel, but my serger broke and I have not been inspired to sew as much and well it has not happened. The book is Sew Sweet Handmade Clothes for Girls: 22 Easy to Make Dresses, Skirts, Pants & Tops Girls Will Love by Yuki Araki. 


DIY Doll Panties from Onesies And Inserting Elastic Tutorial


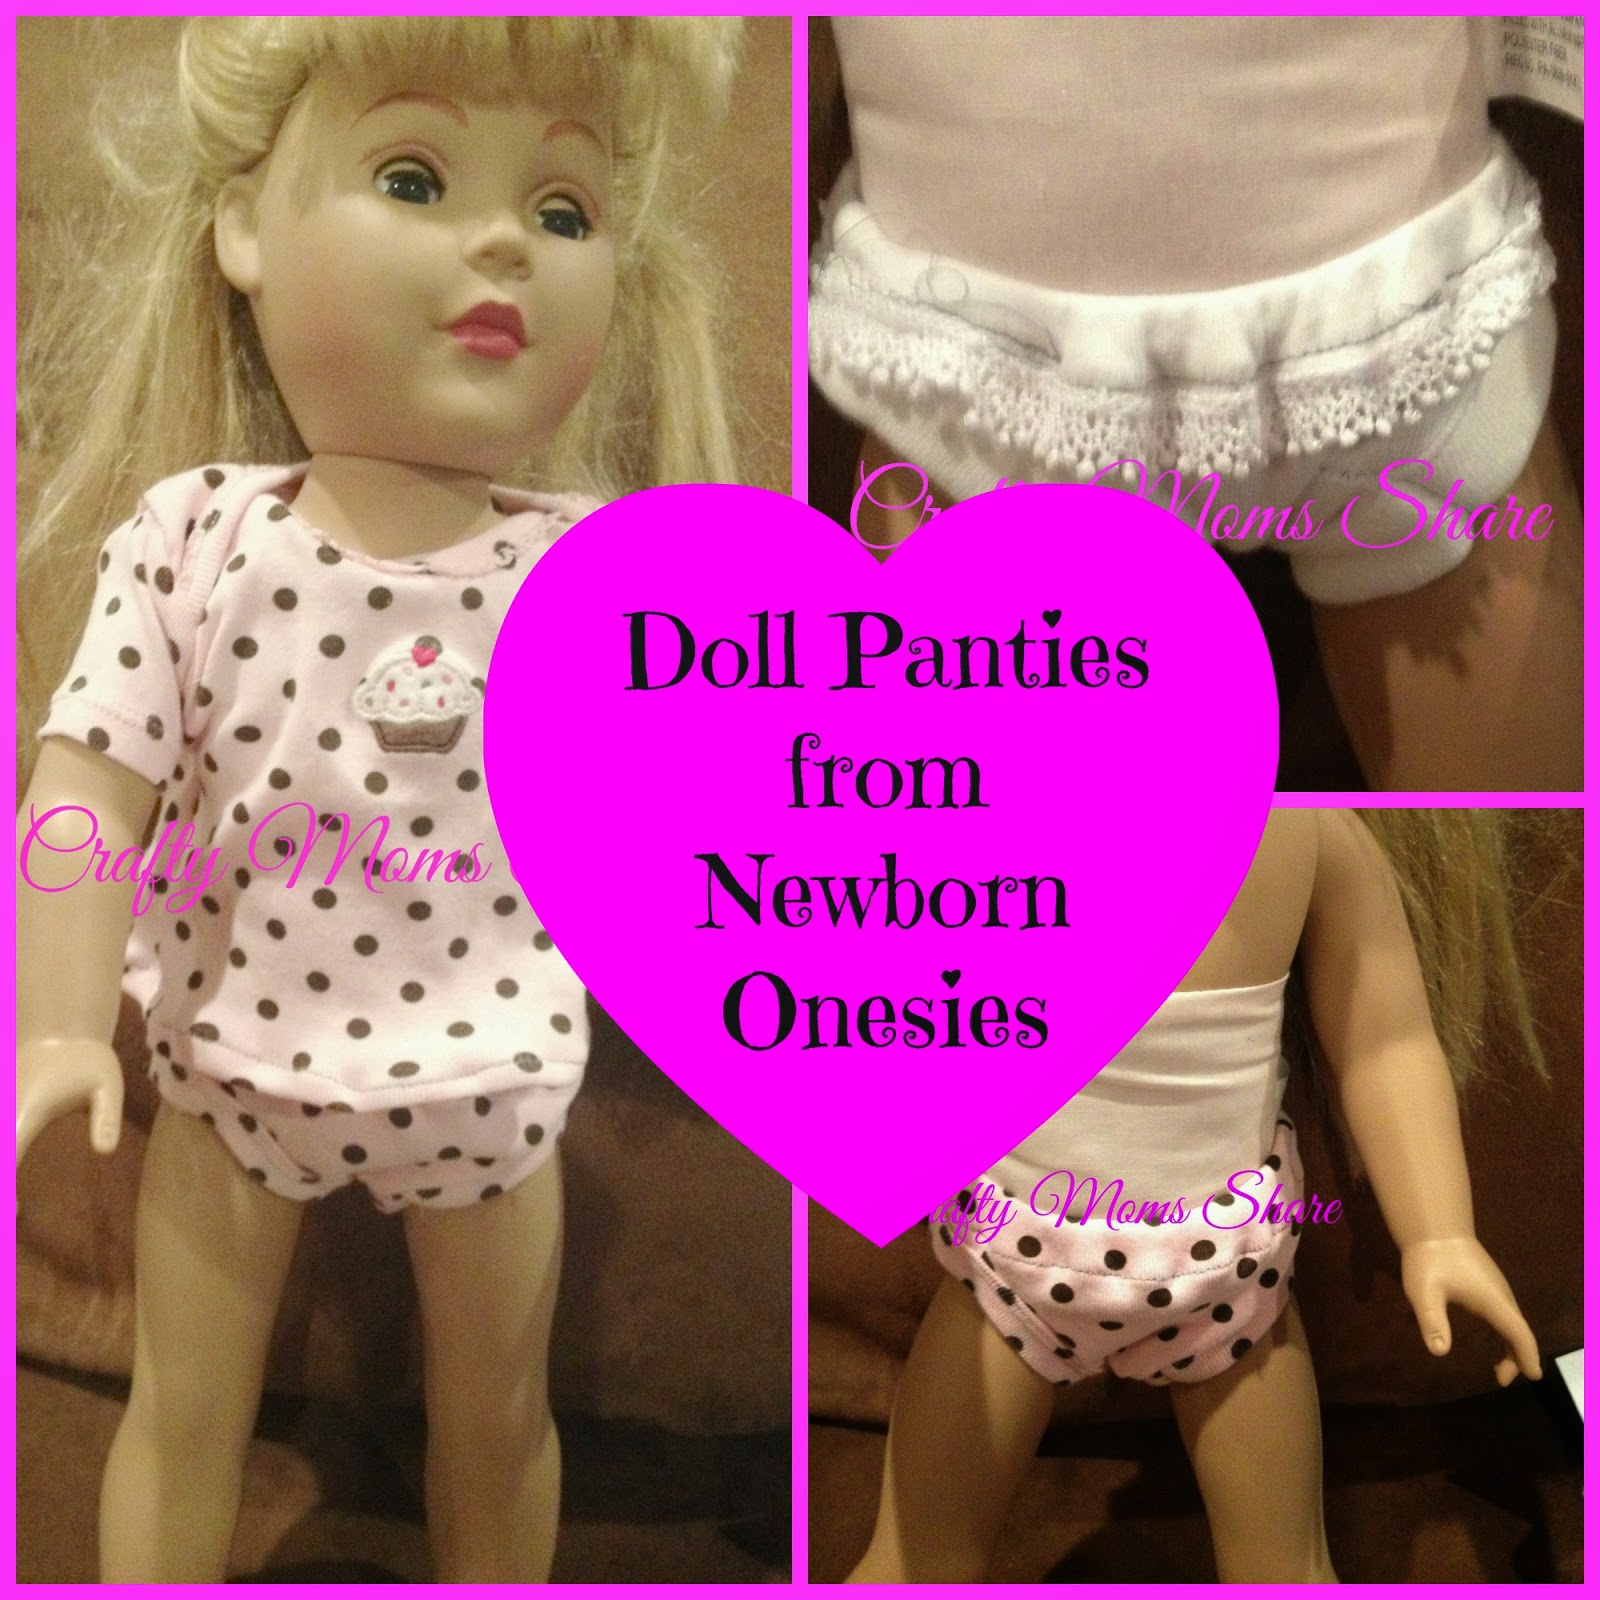
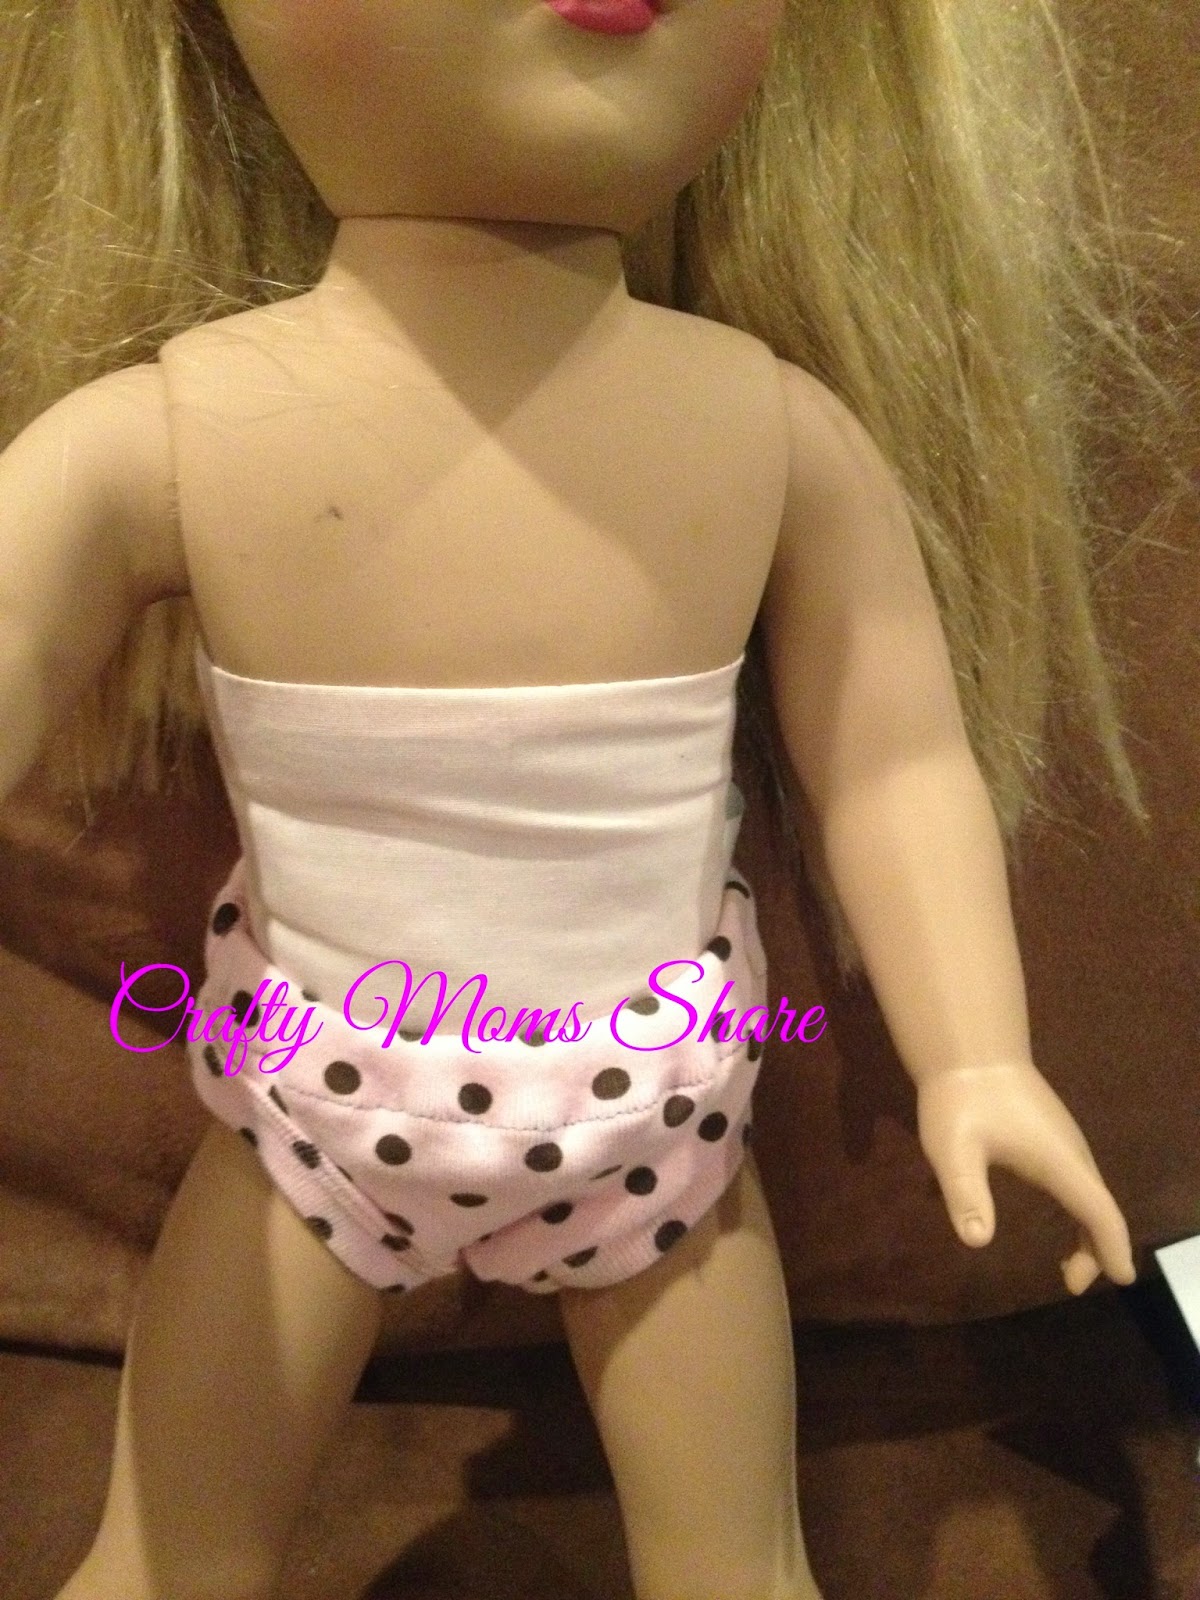
A few weeks ago I showed you how we made doll t-shirts from newborn onesies. Well one  of the things that really bothers me is dolls with no panties and naked dolls. (I hated the stage where we would find naked dolls all over the house. I'm so glad she outgrew that one.) I wanted to buy some panties for Hazel's dolls but was shocked at the prices. I hadn't gotten around to finding a good pattern to make any. Then I saw the bottoms of the newborn onsies that I had used for t-shirts and thought those could be panties. They are pretty easy to make and work as panties. They are not perfect, but since I already had the onesies they are free. So if you have already cut the onesies for a t-shirt you take the bottom and cut the snaps off. I just cut the cuff part off. Then you sew a seam there with right sides together. Next finish the waist seam with a zigzag or rolling seam and fold it down twice so you can fit 1/4-inch elastic through. Sew at the bottom leaving an opening for the elastic.
Next measure the elastic to the dolls waist (American Girl dolls are 10 1/2 inches) and it does not have to be perfect as long as it is not too big. Attach a safety pin to one end and insert the pin through the hole you left in the casing.
Move the safety pin around the casing pulling the elastic through, but make sure you leave a tail of elastic at the opening or you will have to start over. Once all the way around you will have both ends sticking out the opening.
Sew the two ends together to form a loop. Then stick the ends into the casing.
Then stitch the casing closed in the spot that was opened. Turn right side out and you have a pair of doll panties!
And they match one of the doll's t-shirts for perfect underwear combination or pajamas!
I made some for each doll. On the plain white pair I added a little lace to dress them up.
Now I hopefully won't find naked dolls. They can at least have their panties on!

For more doll ideas check out:


DIY Doll Headbands -- Crafty Weekends Tutorial and Link Party


Hazel fell in love with American Girl's Girl of the Year 2010, Lanie Holland. She of course is retired since she was only available in 2010. However we found her on ebay. I had gotten Hazel Lanie's meet outfit, computer and pet rabbit to use with one of her other dolls, but we couldn't get the doll's hair to curl like Lanie's, so she used some money her grandmother had given her to get her own. The Lanie doll we found on ebay and won was naked, so Hazel could not wait to get her dressed. The dress I had bought did not come with her headband or shoes. I decided to make Lanie a headband since the headbands on ebay were running around $15 plus shipping.

Fun Facts about Quilting with Quilt Book Round-Up


Disclosure: I sent digital copies of these books in exchange for an honest review. All opinions are my own. I will receive a small percentage of purchases made through the links provided at no cost to you. Thank you for supporting Crafty Moms Share. 

I love making quilts. However I do it rather slowly most of the time. I have had four quilt books that I haven't shared with you sitting in my review folder and to be honest I haven't been motivated to start any of the quilts. I picked out quilts to make in each one but didn't have a bed or person to make them for and just didn't have the time to do them without the motivation of a reason. I also have had a lot of family things going on and am hoping to start making a classic double wedding ring for my own bed. So with all of that I thought I would do a quilt book round-up with fun facts about quilting first.

Fun Facts about Quilting

  1. The word quilt comes from the Latin word culcita which means mattress or cushion. The English word was first used around 1250.
  2. Quilting as we know it, where stuffing goes between two layers of fabric, started in France.
  3. Rudimentary quilting dates back to China around 3000 B.C. Their ancient warriors quilted chest protectors together.
  4. Ancient Egyptians quilted clothing.
  5. The world’s oldest quilt in existence is the Tristan Quilt. It is in the Victoria and Albert Museum. It is believed it was made between 1360 and 1400.
  6. Le Tristan quilt Noble et son hérault 1395
    Tristan Quilt by Unknown 1395, Public domain, via Wikimedia Commons


  7. Early American quilts were made by the English and Dutch settlers. They used them to keep warm at night while sleeping but also to keep out drafts from doors and windows.
  8. The world’s largest quilt is the AIDS Memorial Quilt. It weighs 54 tons and spans 1.2 million square feet. In 1987 it contained 1,920 panels commemorating people who died of AIDS. Now there are 48,000 panels. Most blocks are rectangles measuring 6 feet by 3 feet or roughly the size of a grave.
  9. Aids Quilt
    AIDS Memorial Quilt Photo by National Institutes of Health, Public domain, via Wikimedia Commons


  10. The largest patchwork quilt measures 270,174 square feet. It is called Manta da Cultura (Patchwork for Culture) and was made in 2000 by Realizar Eventors Especialis in Portugal.
  11. The world’s largest historical quilt is in Antler, North Dakota. It depicts the state as a colorful map. It is 11,390 square feet.
  12. In 2020 the U.S. had approximately 21 million quilters. They had an average age of 63.
  13. Paducah, Kentucky calls itself the quilting capital of the world. It is home to The National Quilt Museum.
  14. A summer quilt is a quilt that does not have the stuffing.
  15. During the 1800s there was a custom for a girl to make a baker’s dozen of quilt tops before she engaged. 12 were utility quilts and one was a masterpiece for her bridal bed. After her engagement she would complete the tops into quilts.
  16. A mother would often make several quilts for her children for when they left their childhood home and became adults.
  17. In the mid 1800s the introduction of the sewing machine changed how quilt tops were pieced. However even with the invention of a separate quilting attachment hand quilting was still favored for another century.
  18. The US postal service has featured quilts from Gee’s Bend, Amish and folk art on its stamps.
  19. It is said the most famous quilts in America are the Gee’s Bend Quilts
  20. Gee's Bend, Alabama LCCN2010639065
    Gee's Bend Quilting Bee photo by Carol M. Highsmith, Public domain, via Wikimedia Commons


  21. Quilting bees originated in the Midwest US during the 1800s . There was a need for socializing due to lack of neighbors. It drew women together to finish quilts and make new friends.
  22. The most expensive quilt ever sold was a Civil War-era piece purchased for $254,000 in 1991.
  23. Dedicated quilters are defined as those who spend more than $500/year on quilting buy on average 99 yards of fabric a year which is almost enough for an entire football field. Dedicated quilters usually spend $3,363 on quilting supplies each year. They spend almost 8 hours a week on-line visiting quilting sites and groups centered on quilting techniques, supplies and news.
  24. Beginner quilters spend 6.9 hours quilting a week on average. Advanced quilters spend around 17.6 hours.
  25. The average quilter in 2020 is a retired woman in her 60s and she owns four different sewing machines.
  26. Quilters answering a survey say they quilt to relax, relieve stress, be creative, and connect with family and friends through gift-giving.

Sources:

Now onto our books. Since my mother gave me many different size strips, I wanted to look at various strip quilts including jelly roll ones. A jelly roll is usually 40 2.5-inch strips of coordinating fabrics. Three out of the four books I am sharing involve strips. The first is Love of Jelly Roll Quilts by Love Patchwork & Quilting. 

From the Publisher: 


Tantalizing, tasty, sweet . . . sew up something good enough to eat!

From the pages of Love Patchwork & Quilting and Today’s Quilter comes a delicious collection of 13 bright, bold quilts that feature the perennially popular jelly roll strips. Strip piecing, basketweave, pinwheels, appliqué, and more—use 2 1/2-inch pre-cut fabric strips in exciting and unexpected ways. Whip up quilts in a range of project sizes and complexity, including a suite of baby projects, a pillow, wall hangings, and bed quilts. Top designers like Susan Briscoe and Jo Avery are featured. Finally, get the best from the pages of the UK’s most popular quilting magazines!
  • Jelly rock-’n’-roll! This project-stuffed book is an easy and affordable way to own stylish patterns from the best-selling modern quilting magazines in the United Kingdom.
  • Piece thirteen projects from 2 ½” precut strips, ranging from bed-size beauties to quick-sew projects
  • Take strip-piecing a step further with innovative techniques and tons of variety

From Me:

This book gives thirteen different projects that range from bed quilts to nursery quilts and accessories. Some are twists on more traditional patterns and others are a bit more modern. Of course any can be made more modern depending on the fabric one chooses. 

I love that the quilt has many strip quilts as well as ones where the jelly roll strips are cut into squares or triangles to make more complex designs. I also love that there are the baby quilt, matching pillow, and a comforter (which Hazel would have loved as a baby). There are some fun projects in this book.

Our next book is String Frenzy by Bonnie K Hunter. 
https://shrsl.com/2oqg6

From the Publisher:


Once you go scrappy, there’s no turning back!

Are you buried in scraps—big pieces, small pieces, hunks, chunks, strips, and parts? Bonnie K. Hunter fans will love her newest book of playful string-quilt projects! Sew a dozen vibrant quilt patterns using the small leftovers from other projects that seem too tiny to save, yet too big to toss. Learn Bonnie’s basics for foundation piecing narrow fabric pieces 3/4” to 2” wide, turning them into dazzling scrappy blocks and one-of-a-kind quilts.

• Have a string piecing party with a best-selling author, the great Bonnie K. Hunter
• Love your leftovers! Become a scrap quilt addict, sewing fabric strings and crumbs into brand new blocks
• Hunter fans will love this offering of twelve “use it all” patterns in her signature style


From Me:

This book has twelve quilts to make. Bonnie uses foundation paper when piecing the blocks. This will make points more clear but also take longer. The creativity in the styles however is amazing. There is even a pumpkin patch one. Most of the quilts use random sizes of strips and not the 2.5-inches of a jelly roll, so these are good patterns to use on scraps or some of the strips my mother gave me. She gave me ones that range from about 1-inch to 6-inches. 

There is a huge variety of styles of quilts in this book and the instructions are easy to follow. Bonnie is very creative with the quilt patterns combining a bit of modern and traditional styles. 

Our next book is Strip Quilt Secrets by Diane D. Knott.

From the Publisher:

Transform fabric strips into unique and interesting quilts

Get ready for some of the best-kept secrets in strip quilting! You’ll start with the basics of cutting, storing, and piecing fabric strips from 1½” to 3½” wide. Explore five techniques to make strip-pieced rows, triangles, and more advanced blocks. Then make the most of your stash by turning precut strips, sliced yardage, and even selvages into fifteen innovative strip-quilt projects. Customize the look of each quilt with blank coloring pages, laying the foundation to design your own strip quilts.

• Sew fifteen quilt projects from fabric strips, in every look from planned to scrap-tastic
• Bust your stash and your scraps! Use extra-wide strips, skinny selvages, precuts, and yardage to sew innovative designs
• Start with easy strip sets, advancing to triangles and interesting layouts that might surprise you


From Me: 

This book has different techniques and is divided up by those techniques. There are strip sets, triangles from strips, resewing strips, individual strips and more. There are a total of fifteen projects in this book, and there is a lot of variety from traditional to modern quilts. She uses different size strips and even has some with the selvages. In the beginning of the book Diane shares about her strip collection and how she creates the strips. 

The quilts in this book range for scrap quilts to well planned color wise quilts. Some of the quilts use a fabric foundation piece but others are just piecing the strips. The instructions are very clear and there are great pictures also to help.

Our final book is a nod to my former life as a geometry teacher. I a tend to love to check out books about optical illusion quilts and 3-D quilts. I believe it is because I taught about them in geometry classes for so many years. It is Stunning 3-D Quilts Simplified by Ruth Ann Berry.

From the Publisher:

Sew three-dimensional quilt illusions

Create a stunning quilt that will have your friends asking, “How did you do that?” Believe it or not, these attention-grabbing projects come together with straight rows of simple shapes. You’ll learn how to sew 12 visually arresting quilts each in 4 colorways giving you dozens of dynamic options. Build your confidence in bias piecing, as you pair light, medium, and dark fabrics for heavenly hexes. Don’t be intimidated—just follow the easy assembly diagrams and watch your quilt come together one row at a time with no inset seams. These 3-D illusions are so impressive, you won’t know whether to keep them on the bed or hang them on the wall.
  • Sew 3-D illusion quilts that have your friends asking how you did it
  • Arrange 60-degree triangles in rows for easy piecing with no inset seams
  • Build your confidence in bias piecing, mixing color values for dimensional effects

From Me:

Most of the patterns in this book offer different sizes however almost all of them are at least a twin size. They are big. I wasn't sure I was ready to make such a big 3-D quilt design which is why I haven't made one of them yet. The book provides the pattern in one set of colors however shows color alternatives at the end of each quilt instruction. Again there is a huge variety with the quilts. They all tend to be pretty modern but some are busier than others. Most of these quilts are made with more solid-ish fabrics and the designs on the fabric help with the shading and thus giving the 3-D look.

The patterns are fun and the color choices really make the quilts pop. I love that they give some color inspiration for each quilt. There is also a table runner which I may play with soon. The book provides a "graph" of each quilt as well so color can be explored a bit. 

So I hope you will get quilting and check out these books. Did you know September is National Sewing Month? It is the perfect time to start a new quilt project! Will you join me? Be sure to check all of my quilt posts for even more inspiration!


DIY Doll Camping Equipment

Happy New Year!! I hope all of you have a healthy and successful 2015!! I know I am planning some exciting things for Crafty Moms Share and hope you will stay tuned. (One of the best ways to stay tuned is to subscribe to Crafty Moms Share! See the ways to do so in the right column.) I am lining up some amazing giveaways and reviews as well as fun crafts and activities to do with your child(ren). 

Today I thought I would share the main part of Hazel's birthday present from us. This year's family birthday party was American Girl Doll themed, so it seemed appropriate to give her something for her dolls. We gave her the beautiful carrying case with murphy bed from Queens Treasure for Christmas with a homemade quilt. When we were at the American Girl Doll Store for my birthday this summer, Hazel fell in love with the tent they sell. However I was not going to spend $85 on it. I figured I could come up with some way to make one. I happened to find roasting sticks on clearance for a $1 at the end of the summer and bought them thinking they could be the poles for the tent. I also saw this great tutorial over at The Frugal Crafter using cardboard to stiffen the sides, but I really wanted her tent to have a window like the one at the American Girl Doll Store. After a couple of tries I got a tent. It is not perfect and I now know what I would do differently. The first would be not bothering with the "poles". 

Sew in Style Make Your Own Doll Clothes -- a Crafty Weekends Review and Link Party

Crafty Weekends Review and Link Party
Disclosure: C&T Publishing sent me this book in exchange for an honest review. All opinions are my own! I will receive a small stipend for purchases made through the links in this post. Thank you for supporting Crafty Moms Share!

Tonight I am excited to share with you a fun book that is perfect for your doll lovers to learn how to sew. It is Sew in Style: Make Your Own Doll Clothes by Erin Hentzel.

Creating Historic Style Doll Quilts for Beforever Dolls


Disclosure: Some of the links in this post are affiliate links where I will receive a small percentage of any purchases made through them at no cost to you. Thank you for supporting Crafty Moms Share!

 This past week was school vacation week here and Steve took the week off as well. We spent a long weekend with my parents and had some family time including a trip to the American Girl Store. My parents gave Hazel the retired American Girl Doll, Kirsten, for Christmas and gave her Kirsten's bed (well a homemade version my mother found on-line) for her birthday. My mother told her she would make a quilt for the bed with Hazel. My mother and I picked out a set of farm style precut fabrics for Kirsten's quilt. Her bed is blue with a heart cut out off the ends and berries and leaves painted on it. Her story is from the 1850's and she was an immigrant from Sweden and her family moved to the prairie. Her quilt was a patchwork quilt. (Something like this charm pack would also work.) Hazel has been making 9-square quilts for awhile, so she was excited to make a patchwork quilt for Kirsten. My mother took the big precut squares and cut them into quarters. Then Hazel and Kirsten began to arrange them on batting.

DIY No Sew Doll Purse


Sorry for being a bit sporadic this week. For the first time in our almost eight years of marriage I have gotten the house to myself for a couple of days. The main reason is for me to organize my extremely messy and useless craft room. Well, I got a good start on it!!

Today I wanted to share a simple way to make an 18-inch doll a purse. I was inspired by the tutorial over at Doll It Up: Make a Doll Purse Out of a Coin Pouch. I had bought a coin pouch at Rite Aid from the $1 bin, but I hadn't gotten around to making it like the one over at Doll It Up. Then when we were at Michaels the other day I saw this adorable panda head coin pouch on clearance for under $1 and knew it would make a perfect one. Hazel has been really into pandas lately.

To make it all I did was measure a piece of red ribbon so it would hang on the doll the way I wanted it to. I cut the ribbon a little long so I could fold the ends in and cover them. I glued the ends down and then glued the handle back over the end. I didn't want to try to sew the vinyl or whatever the coin pouch is made of. After the glue dried it was ready for Hazel (the doll) to use.
For more doll ideas check out:


Me and My Sewing Machine -- a Crafty Weekends Review and Link Party

Disclosure: C&T Publishing sent me a digital copy of this book in exchange for an honest review. All opinions are my own. Purchasing items from some of these links provides Crafty Moms Share a small percentage at no extra cost to you. Thank you for your support!

Have you been crafting this week? Most of my crafts this week were restricted to crafts to use in Sunday School. I was home with a sick child and Steve was sick as well. It was not a pleasant time, but everyone is feeling better now!! As a result I don't have any crafts to share, but am going to review Me and My Sewing Machine by Kate Haxell. 

Sewing Machine Adventures with Kids--a Crafty Weekends Review & Link Party

Disclosure: C&T Publishing sent me this book in exchange for an honest review. All opinions are my own! I will receive a small stipend for purchases made through the links in this post. Thank you for supporting Crafty Moms Share!

Do you have a child who wants to learn how to use your sewing machine? I do. Hazel really wants to use my machine. I have been trying to figure out the best way for her to learn. I found the perfect book to help. It is The Best of Sewing Machine Fun for Kids by Lynda Milligan and Nancy Smith. 

Sew Useful -- Book Review

Disclosure: Search Press gave me a copy of these books free of charge for this review. All opinions in my review are my own and I did not receive any other compensation. They also sent me a copy to giveaway! As in all my reviews I am providing links for your ease, but receive no compensation.

Today I am sharing with you a wonderful book for helping you organize your house (and especially your craft room). The book is Sew Useful by Debbie Shore.

http://www.searchpressusa.com/bookdetail.asp?pISBN13=9781782210856


Square It Up Quilts

So back in September when I was really just beginning to get into the blog world, I won a contest over at Sew Happy Geek. I won a pattern designed by Jenna of Sew Happy Geek called Square It Up! and the fabric to make it from the Fat Quarter Shop. I haven't really been quilting in about three years. I made but did not finish a baby quilt for Hazel. It is almost done, but I don't know what I'm going to do with it.

Anyway, this pattern went together so quickly and I noticed how the colors of the fabric I won matched my bedroom walls perfectly so I decided to buy more fabric and extend it to be a bed quilt. I shared the pictures of the completed quilt on Friday, (but I put one at the top in case you don't want to go back). The original size quilt top I pictured here. On October 19th, I was honored to guest blog at Sew Happy Geek and I showed three quilt tops at my blog here. While waiting for the fabric to extend the quilt, I decided to make one for Hazel. I had found the perfect center block for her--a Hey Diddle, Diddle square that was suppose to make a pillow. Since it came with two, I also made a baby quilt. I basically did hers and the baby quilt as scrap quilts though I did buy a few more nursery rhyme fabrics to go with my nursery rhyme theme.

Well today, I finished Hazel's quilt. (My shoulders are not very happy about spending so much time bent and pushing the heavy quilts the past week--oh, well.) So today, I'm happy to share some pictures with you. I took the majority of the pictures on the guest bed since the bed rail and all her pillows and the wall make it hard to get a good picture at her bed. Behind the guest bed is the beautiful quilt my mother made me to take to college. It is a family favorite--my father really wants it to hang in their house, so I put it in the guest room they stay in.

And then her bed--she has a cold so we have the wedge pillow on there and what not, but you'll see what looks like.

Now I just need to finish the baby quilt. I also need to add a huge thank you to my mother for helping me back, layer and pin both of these large quilts!! She actually even provided me with the backing fabrics. Thanks, Mom!! I love you!